Tuesday, May 3, 2016

GREAT Aunt Jan's Spaghetti Pie


Pie is a really big deal on my dad’s side of the family. An example of this is that we will sometimes have pie parties where everyone brings multiple pies and we all just sit around and eat pie. I’m not kidding... There could be 30 pies there at one time.

The most recent pie party (they weren't all there yet either)

Well my great aunt Janice is a very amazing lady who always makes sure that I emphasize the GREAT in great aunt. She took it upon herself to come up with the only non-dessert pie at the pie party. She got a lot of crap for doing so but by about the 5th piece of dessert, something a little lower in sugar is pretty amazing. I was really young the first time I tried it but I loved it and used to make my mom cook it for me whenever I could. I never actually saw Aunt Jan’s recipe, but this is how my mom and I make it. I would describe it as a hybrid between spaghetti and lasagna. (it’s faster than lasagna too I think)

Without further ado, here is how to do it. (I usually don’t measure things when I make this so I apologize in advance if things are a little vague.)

First and foremost, cook about half a pound of regular spaghetti and brown ½ to 1 lb of ground beef.

Once the noodles are cooked, rinse them in coolish (ie so the egg wont cook on the pasta) water and drain. Stir noodles, 1 egg, and about a ½ cup of grated parmesan cheese until well blended.
An egg layed this morning by either Carol or Audrey

Grease a pie dish and use a spoon (or your hands I guess if you are feeling wild) to pack the noodles into the dish as much as you can. The firmer the better girlfriend, this is your “crust”.
Cram those noodles in there!

Next spoon out about ¾ to 1 cup of cottage cheese onto the noodle-base and spread it out with a spoon to cover the spaghetti the sprinkle with grated parmesan.

Mix up the cooked and drained ground beef with a tomato sauce of your choice (I used some that I canned from my tomatoes) I used about a cup of sauce but feel free to use more or less depending on how saucy you like things. Spread this mix over the cottage cheese and parm. Top that thing with some shredded mozzarella!
Never skimp on mozzarella

Bake in a 350 degree oven for 25-30 minutes until heated through and cheese is melty and starting to brown. Remove and let set for a few minutes before eating. Slice it like you would a pie! You should have pie for dessert too! Make this for supper on pie day, March 14th! Oh boy, I love pie!
Bad lighting, but you get the idea


Ingredients

  • ½ lb of spaghetti
  • 1 egg
  • ¾ cup grated parmesan cheese
  • 1 cup cottage cheese
  • ½ lb ground beef (you could omit this for a vegetarian pie)
  • 1 cup or more pasta sauce
  • 1 cup shredded mozzarella

 
Directions

  1.  Brown ground beef and drain
  2.  Cook pasta, rinse and drain
  3. Mix pasta, egg, and ½ cup of grated parmesan and press into a greased pie dish
  4. Spread 1 cup of cottage cheese over pasta mixture then sprinkle with remaining parmesan
  5.  Mix meat and sauce and then spread over cheese
  6. Top with shredded mozzarella and bake in a preheated oven at 350 degrees for 25-30 until heated through and cheese is melty.
  7. Let set a few minutes before serving in wedges

Meat Chickens 2016 Round #1


OK, so the whole at least one post a week thing is seemingly still a challenge…

Boomer checks on the chicks often
Since the last post I have been doing a lot including writing a few posts that never got posted. On the 21st I picked up 30 little baby meat chickens that are now almost three weeks old. We still have 29 of them as one died from who knows what as chicks often do. The remaining 29 are strong and healthy peeping away in my kitchen. They don’t smell so hot but at least they are alive. Below is a post I wrote almost 2 weeks ago now but never got around to sharing because I had yet to find the best way to get my pictures onto my laptop. The tale is about the first night we had the chicks and how we almost lost all of them in the first 45 minutes. Not a great night…

Here it is:

On Thursday evening I took a lovely drive along the Androscoggin River with the windows down. I played Jenny Lewis in the truck with a cardboard box in the passenger seat all ready for 30 fluffy yellow chicks. We had put in an order for 30 Cornish-Rock chicks to raise for meat and they were finally ready for pick up at a local farm. I had spent the day in Bangor at a Forestry seminar so unfortunately it was almost 7 by the time I got to the farm but the folks there were as friendly as ever and we stood around to chat for a while before I headed back home.

We already had all the equipment needed for the chicks and I had rounded it all up that morning and filled feeders and waterers so all I would need to do was move the little birds into their new home. Ideally they would be set up in the barn but because we didn’t get our wiring all done in time I decided to keep them in the house. (Something about a heat lamp run via an extension cord 24/7 just sounds like a bad plan) So the chicks would be in the basement. I got everything set up and that’s when I saw it… a large giant shed snake skin. In. My. Basement. Now these chicks were just hatched Thursday and without their downy fluff they are probably only the size of my thumb; they’d be a pretty easy target for a snake to gobble up.

 I didn’t want to disturb the chicks too much after just putting them in the brooder so I figured I would wait for Matt to come home and we’d work out what the best plan would be (he was working late on a wood chipping job) So in the meantime I called my mom to fill her in on the precious yellow puff balls. We weren’t long on the phone when I couldn’t believe how loud the chicks seemed in the basement, I mean, it was incredible. I stupidly wrote it off as chicks being chicks and kept talking until finally I decided I had better go give them a check as they’d been down there about a half hour now. The second I opened the basement door I started to panic.

Where’s the light! Why is the heat lamp off!? “Mom, I have to go. Now.”

The bulb had blown and my 30 babies were getting colder by the second but that’s not the worst of it. When I got to the brooder I freaked. Apparently, when the light went out the chicks frenzied and tipped over their waterer. They were all soaked and cold. If you know anything about baby chicks you know that that is the last thing you want… They should be kept at around 95 degrees their first week. It was maybe 65-70 in the basement and they were wet.

All thirty of them their first night after the broken heat light event
I grabbed the whole brooder and flew up the stairs, grabbed my hair dryer and got to work. If I had more time to think about it I probably would have been sobbing but there was no time. I quickly started to blow dry and fluff each little chick back to a fluffy yellow but it was obvious that some were worse off than others. I had to work fast and could only work on one bird at a time so after I fluffed some of the worse looking chicks I ended up sticking them in my shirt to stay warm while I dried the others. Not exactly glamorous, but it worked.

Imagine Matt’s surprise to come through the door to see his wife blow drying chicks with about 5 poking out of her shirt…

I tried to get him to go get a new bulb but by then, he pointed out, all the stores were closed. This is when I almost cried. He started to help clean out the soaking wet bedding and put in clean dry new stuff as I kept going.

We ended up using a crummy 60 watt light bulb over night and somehow the chicks all lived. This morning I picked up another whole unit and an extra bulb too. All the chicks are healthy and happy and seem to have fully recovered from the crisis. We were blessed this time and will hopefully be wiser the next time.


This is Goshawk, he is the runt of the group
(he is the only one with a name though)
Now I know that I should never trust last year’s equipment without a thorough test and inspection and I just need to pay better attention. I feel so stupid, but we really and truly got lucky to have not lost any of these fragile lives in the process.

As much as I would like to never let this story leave my house, I am sharing it in the hope that maybe someone will read this and be able to avoid being in the same situation with potentially worse outcomes. I caught it just in time. Check your equipment and if something just feels wrong, go check. Even if it’s for nothing you still get to go see baby birds again. Peep peep peep.

I would say "expect to see more frequent posts in the near future" but clearly that hasn't been working out well at all. So until next time! PS pigs are in the near future! Take care and whatever you are be a good one!


Tuesday, April 5, 2016

Big Life Events Can Really Set You Back On Blog Posts

Well! I thought it had been a while the last time! (er, when I said I would be updating weekly...) I say that buying a house is a good excuse! I wish I had been updating the whole time as it was quite a process, but needless to say, after a lot of hard work and jumping through hoops of fire, we are now the proud owners of an 1870s brick farmhouse, a nice barn, and 63 acres!

Farewell old makeshift rented homestead!
Some of you may have noticed a change in the name and domain of the blog from "the davenport homestead" to "the brick house homestead" Now that we are hopefully settled at our forever home we have gone with The Brick House Homestead as the name of our farm.

For those of you wondering, we went under contract January 11th and closed on the house on March 21 (my birthday!) Everyone is adjusting well and we are making plans for more animals as the days go by. The chickens got moved coop and all and even layed an egg on the voyage over. A friend helping us said it must have been when we went over the train tracks that the egg was laid ;)

The first night wasn't easy...we slept on a mattress on the floor and moved our pets the same day we closed. The cat had an anxiety attack on the 20 minute ride over from our old house and the dog barked and cried all night at the typical sounds of an old house and road traffic. Those same old house sounds kept me up too and at around 3am I was convinced we had bought a haunted house and made a huge mistake. Funny what a night of no sleep will get you thinking... I was so tired the next day that my boss sent me home early. What a nice guy! Everyone is happy now though (even my boss), and we've been here two weeks and there's no signs of ghosts (yet) haha.


Looking out toward the fields at dusk

We've been working on all sorts of projects around here, but the weather has suddenly turned from the 70s back to the low 20s! More updates to come on such projects so stay tuned! And I mean it this time! Also, pictures of the new house!

Until next time!
Jules


Thursday, January 7, 2016

I Mean, It's Only Been 2 Months...


Wow. Here I am updating 2 months later! What crazy two months it has been too! I started a new job and I like it pretty well! We have gotten closer to buying a farm in the past two months than we have yet, and the holidays have come and gone!

Part of my New Year 2016 Goals is to update this old blog here at least once a week. Lawdy, there's certainly plenty to write about! Now that I am finally getting into the swing of things with my new job I should have more time to do so!

First of all, we finally moved the chickens into our new and finally finished coop! They are a flock of happy birdies! Especially where it has really started to get cold up here! I didn't see anything above 12 degrees all day where I was working on Tuesday but I was glad to know the chickens were safe a warm!


With a new roost and 3 spiffy and clean nesting boxes the girls will have no excuse to be grumpy these days. Soon we will get our light hooked up and they will be even happier.

Stay tuned for more legit updates and exciting stuff about trees or animals or cooking!


Wednesday, November 11, 2015

Butchering the Roosters


If reading about raising and using animals for meat bothers you don’t read any further. I’m not planning to be too graphic or anything, but I don’t want anyone to get upset.

This spring we bought a handful of little Silver Laced Wyandotte chickens. This is a dual purpose breed meaning that the birds are useful as both egg producers and as meat producers.  We went with a dual purpose breed as we couldn’t be sure at one day old if we were getting males or females and we figured that those who wouldn’t be earning their keep with eggs would at least be able to provide us with a nice dinner. Out of the 5 chicks we got, 3 were roosters. Greatttt.

We have known since the beginning that any roosters would be headed for the freezer as our neighbors are absolutely 100% not down with cocka-doodle-doos in the morning. We had angry neighbors pounding on the door back in July over our handsome French Copper Maran rooster, Cogburn, demanding we get rid of him by the end of the week. I’m sure they are probably ready to lynch us with the whole 3 part harmony we have going on in the mornings these days.

The roosters would have been fine to butcher a whole month ago, but we have been so busy with getting married, our honeymoon, and winter prep that it just keeps getting pushed back. Matt and I decided that it needed to become a priority for the weekend. The worst part is getting everything set up and cleaning it all up when we’re done.

Some people will cut the head off completely on a block but we choose to use the “killing cone” method. We made our own cones from old plastic jugs, but there are special stainless steel ones you can buy as well. We prefer the cones because the chicken is put to sleep being upside down and is restrained by the walls of the cone. This eliminates the flapping and running around headless. It is easier to watch and much cleaner as well.

We have a friend with a homemade chicken plucker that we borrowed for the 10 Cornish x birds, but we decided to pluck these three by hand. It wasn’t too bad and went very quickly.


Usually Matt does the killing and most of the plucking and I am in charge of eviscerating. It is hard to do the first time, but gets easier the more times you do it. The first chicken we ever butchered took almost an hour before it went in the cooler, but I can clean one now in well under 10 minutes. Learning where all the inards are and how they are attached makes a huge difference.

We choose to let the birds chill/rest for 24 hours before freezing them. This allows them to be more tender than they would be otherwise. I then wrap them and vacuum seal them with my food saver to help them to keep as long as possible. With a total of 13 birds in the freezer we try to eat about 1 per month to ration them out.


The wyandottes weighed out at an average of 2 lbs and 10 oz (dressed) at about 18 weeks. The cornish x birds were at least double that at only 8 or so weeks. Needless to say, it is much more efficent to raise meat breed birds for meat. (Go figure)

Tuesday, November 10, 2015

Raccoon Drama


You know what a homesteader’s number one enemy is?

Predators.

If you have livestock and haven’t dealt with them yet, you will. And when you do, you will hate them.
My depiction of the raccoon in our chicken run

We have been dealing with raccoons bothering our chickens a lot this fall. The chickens’ coop/run is right outside of our bedroom window and we have a motion light very near to it. The first time we scared the rascal off from the window and after that the light coming on seemed to be doing the trick.

About a month ago the light came on as we were getting ready to go to bed. We just assumed the girls had set it off as they flew up to roost on their coop roof for the night. Then there was a squawk.

I ran to the window, but I didn’t see a raccoon. I saw two! And they were INSIDE the chicken run fence! We knew we needed to act fast and didn’t have a lot of time to contemplate how they actually got in there. I told Matt to get the .22.

Like a hillbilly, Matt shot one of the coons from our bedroom window but it flew up the side of the run and out through the chicken wire over the top. Now we know how they got in there…

But wait. Coon A ran off. What happened to Coon B? He disappeared! Or…

No, that couldn’t be. He can’t be in the COOP. No.

Oh yes.

He’s definitely in the coop.

So out we went. The end of that story is that there was one less coon in town.* We hoped the other one learned his lesson.

Well, last night the light came on. I didn’t hear anything but it woke me up so on a whim I checked to be sure.

“Matt.”

(Still half asleep) “What.”

“Coon. Shoot it.”*

And so we now have saved the chickens twice. We have been so lucky that we’ve been fast enough to see them before they start ripping and tearing. This is also very good motivation to finish our new, much more raccoon-proof coop.

Those of you who don’t know about raccoons and chickens, let me fill you in:

Raccoons eat chickens. They rip and tear into them and often kill them all at once and eat only part of each. They won’t just grab one and take it home for Mrs. Coon to put in the stew pot. They are vicious and ruthless and if you don’t get rid of them, they will keep coming back until you do. They are incredibly smart and strong. They can rip through chicken wire and know how to open doors. Are they cute? Absolutely. Do I want one poking around my chicken coop? No. And we are not about to start moving them all over the state. It’s not worth it.*

I’m hoping this will be the last we see of the raccoons for a while. We shall see.

* In the state of Maine, under Title 12 Section 12401 it is stated that

“a person may lawfully kill, or cause to be killed, any wild animal or wild turkey, night or day, found in the act of attacking, worrying or wounding that person's domestic animals or domestic birds or destroying that person's property. A person who kills a wild animal or wild turkey by authority of this section shall report the incident to the Maine Warden Service as provided in section 12402, subsections 3 and 4.”

Making Cider 2015


Much like everything else this year, cider pressing kept getting pushed back until it’s almost too late. We bought a lightly used, homemade cider press earlier this year for a mere 300 dollars and immediately couldn’t wait for apple season. Once the apples finally started to ripen we were swamped with wedding stuff and then once the wedding was over we had so much other stuff to catch up on it just kept getting forgotten. Seriously though, who could possibly own a cider press and miss out on making that sweet brown nectar?

Making apple cider is no new adventure for me. My family made gallons and gallons every year up until recently with my uncle’s antique press. He had an electric motor to chew up the apples and a big threaded pipe to press the juice out of the fruit. The whole family would bring bins and bins of apples and apple dishes and everyone would help out to make the golden goodness. We called the annual event the “Apple Squeezin” and every year whoever put in the most work would be crowned as the “Apple King or Apple Queen.” It was a great time and everybody always went home full of apples and happiness (those are arguably the same thing, no?)

Our cider press


We don’t get too fussy about our cider; we never did at my uncle’s either. If you try to buy all your apples like you would eating-apples you would go broke. In my family we would go to a PYO orchard and make a deal with them to take totes of drops for a very cheap price. Bruised apples don’t affect cider as they get all chewed up anyway. We would try to leave the wormy ones out, but let’s be honest; a little extra protein never hurt anyone. This year we got our apples from a friend with some trees that couldn’t use all the fruit she had.

That's a lot of apples


We also don’t pasteurize our cider. Some people wouldn’t touch it, but I’ve been drinking it since I was two and I’m still here. We (I was) were planning to try and brew some hard cider, to put a bunch in the freezer, and to leave some out for drinking and mulling. We (I) made all these plans of course before we broke our little press and ended up with only a half gallon. Matt apparently knew this wouldn’t work out. He’s an unbeliever.

Well, we had great plans to recreate the Apple Squeezin’ with a few friends and family this year but it never materialized so we decided that we better get some apples and try our new magic maker out before all the apples turn into applesauce.

Our press is very simple in comparison to my uncle’s beast. Ours has a hand cranked scrater (that’s what I call the thing that chews up the apples; SKRATE-ter) made up of some stainless steel screws on a round pole that turns. This seemed like it should work well enough and I was so excited to start pulverizing the apples. Welllll, it didn’t work so hot. It just kind of twirled the apples around and never really chewed them up. This was disappointing.

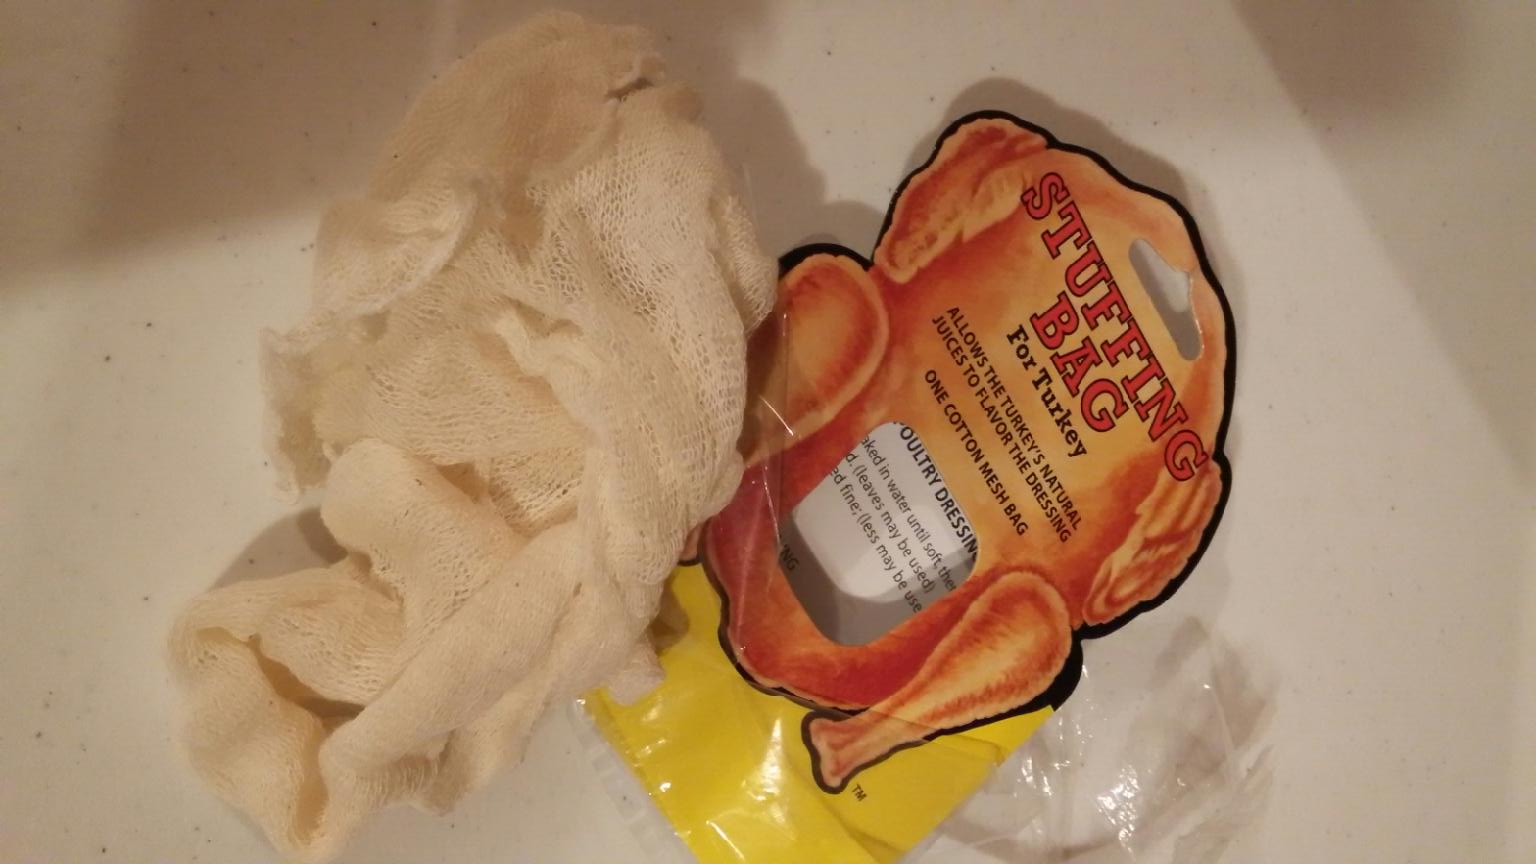
To make things worse, I never ordered those nifty cider bags you’d need to use with our press because the slats on the pressing bucket are so far apart. I bought these turkey stuffing bags on sale at Wal-Mart thinking they would work…hah. No.

Don't skimp on cider bags. Just. Don't. Do. It.


At full capacity they were about the size of a tube sock and it took a lot of doing to fill them to begin with.

So we decided we needed to get creative. We had a billion apples after all. So we started to cut the apples in half and put them directly into the pressing bucket and squish them that way. That sort of worked for a little while but it wasn’t great.


This is about as productive as it got


At this point we started to hear some cracking and popping sounds and Matt (who was running the bottle jack) said, “That doesn’t sound good”

To which I said, “It’s just apples Matt. Don’t be so stupid.”

“I think that might be more than apples.”

“No. Keep going. Why are you stopping? It’s the apples. Keep GOOOOO-ingggg”

About here is when our pressing basket blew open with a startling “POP” that even jumped the dog and Matt gave me that “why can’t you ever listen to me look.”

Not much, but sooooo good


So with our bin of apples still more than full and a mere half gallon of cider we threw in the towel and cleaned up our mess. With great disappointment we dumped our mangled apples in the compost and went back inside to plan how to re-engineer the entire unit. We may not be able to make much cider this year, but next year it will be in the fridge, in the freezer, in a warm mug with spices, and in a large glass vessel getting more potent by the day.

Cheers!

Thursday, November 5, 2015

The Missing Piece of Pyrex (Or The Highlight of My Honeymoon)


I'm a little late to write about this, but I'm still excited about it anyway. When Matt and I moved into our first apartment year ago, I needed a set of mixing bowls. My mom had two Pyrex sets that she had received as wedding gifts back in the early 80s. Both sets were incomplete but still wonderful. She gave me one of them that was called the "Butterfly Gold II" pattern.

The middle bowl from the set wasn't missing, but she wanted to keep it as it was the bowl she used the most (especially for pie dough). I didn't care as I just needed some bowls to mix stuff in so I was happy to have just the small and large bowls. They were like new in comparison to the bowl she kept that had been used and washed so many times it barely matched anyway. In case you didn't know, years of pastry cutter action can really wear down even the best bowls.

Well, the older I got the more I started to appreciate Pyrex and really wanted to have a complete set. I didn't want the worn out bowl and knew she wouldn't give it up anyway so I started to look on eBay and craigslist. Hah! What I learned was that the "Butterfly Gold" pattern was one of the most common! I thought "Oh good, this will be easy!"

Wrong.

The bowls I had were from the "Butterfly Gold II" pattern that was only made for a very short period of time. Maybe this wound be harder than I thought... It was. There were a few on ebay, but I couldn't see spending 30 bucks on a mixing bowl. Soon I found myself stopping at every goodwill and junk shop for the ellusive bowl.

Flash forward to a few years later and I'm in Peterborough NH. Matt and I are bored and ask a store clerk if there are any antique shops around. "Nope." she says. So we leave and on our way out she calls, "Oh! Wait! There's a white building down blah blah blaah not helpful directions." So we tried to find the place and couldn't. After we gave up and tried to get home, there it was! We went inside and there was all sorts of over priced home decor. We went into one of the rooms, and BOOM, there were the bowls. The whole set. Like new.

I went over and picked them up. The tag said: "$36 - set" on the smallest bowl. Darn it! So close! I knew they'd never split up a set in that condition. We kept browsing and I found some neat old hankies that I wanted. As we were checking out I decided to try my luck and ask if they would consider separating the set. The lady at the counter thought for a moment and said the bowls had just come in last week. Then she said, "$10?" Sold. I didn't even try to haggle.

I have never been so excited about buying a dish before. I had been looking for years and it finally paid off! Seeing the full set all in similar condition was so awesome! I can't wait to find my next target! A medium sized red bowl from my grandmother's 1950s set! Let the search begin!

Here's to Pyrex and the adventures we have while finding it!


Thursday, October 29, 2015

Problems With Forestry


My trusty steel toes

 
You know what’s hard? I’ll tell ya.

Being a girl and trying to dress adequately for a professional event in a male dominated field (read: forestry). That’s hard.

You are expected to be in dress clothes and look professional but also convey that you could throw on a hardhat and lay out a skidder trail. Now, to make things harder: you’re a girl.

It is so hard to find the line between not looking so feminine that people will discount your abilities but not dressing in a way that appears frumpy or overly masculine. It’s literally a nightmare.

Interviews are supposed to be stressful. I get that. But when you are more stressed about what to wear for shoes than questions like, “What is your greatest weakness?” or, “What is a time you made mistakes at work and how did you handle them?” you know it’s bad.

Should I wear heals? No, they’ll think I’m a girlie-girl.

Should I wear my steel toe boots? No, they’ll think I don’t know how to dress for the office part of the job.

How about sneakers? Ha-ha nice try. No.

Sandals? Maybe if you just really don’t want the job you could.

Flats? Too bad my pants are long enough to fit an Amazon…nope.

Of course this dilemma never begins until the night before at 9:37pm so it’s not like I can just run into town and find the perfect women’s-forestry-super-interviewer-shoe-of-the-year. (By the way, if you ever see an ad for such a thing, send it over this way and help a sister out…)

So guess what.

I wore my steel toe boots. Yup. I did. I cleaned &oiled them that morning so they looked brand new. And you know what? Then I had to worry that they would take one look at my brand new (looking) boots and think I had never done any real work and only wore them so that they would THINK  I did real work! ARRUUUGHHHGH! WHY ARE THEY SO JUDGY!

At this point I decided that I was being UTTERLY REDICULOUS and just left and went to my interview.

You would never believe what they said when they saw my shoes.

Nothing.

Because they didn’t pay any attention to my shoes at all. It was all over nothing.

There is no intended moral to this story, but I hope you enjoyed it anyway. I can’t be the only one who has thoughts like this about interviews. Why do we always assume that everyone is judging us so much? All that being said; I do still feel that it is very difficult to dress correctly for such events. Especially as a woman.

Friday, October 23, 2015

Those Who've Passed This Way Before Us


Saw in a maple tree
Sometimes when I walk in the woods and it's so quiet that I can hear the leaves fall it can be easy to feel like I'm on ground never walked by another person. The animals carry on with their business and run around through the trees and the brooks babble gently along. It's so calm that when my cell phone goes off it sounds so loud that people from miles away could hear it.

Places like this are a treasure in today's world. It's one of the reasons I love my job. I also love the little forgotten tidbits left behind to remind me that I'm not the first or only person to pass this way. Yesterday I snapped this picture of an old bow saw grown into a maple tree on a state owned piece of land in New Hampshire. When I see things such as this I love to try and figure out how it got there or how long it's been there. Was the sawyer trying to cut or prune the tree and the saw became pinched and he gave up on it and left? Unlikely... Perhaps someone hung the saw on the branch of this maple long ago while they stopped for a drink at the stream less than ten feet away and then forgot the saw when they left. Who knows? That's the wonder of it. It seemed that the blade had rusted away as the tree continued to grow around the saw which might mean it's been there for quite some time. Knowing that this land used to be owned by one of the paper companies and was cut relatively hard, combined with the size of the tree, it is easy to assume that the saw hasn't been there for too many decades, but it's a fun find either way.

Treasures and artifacts left as junk by those who have been here already can be so interesting and often lead to others. This saw for instance, was not far from an old campy-looking site that is now only a few bricks and some metal pipes. If somebody knows what to look for they could also notice the smooth, flat strip running by it that was likely an old road, long abandoned and overgrown.

It's funny how land changes overtime. Areas once bustling can feel utterly untouched in just 30 years or so. Some uncharted woodlots transform into sub-divided suburbia while others grow wild where they were once carefully managed and traveled often. I hope that as our population grows we will always have forgotten areas to discover clues about those who have passed this way before us.

Monday, September 28, 2015

Wedding Preparations - Pumpkins and Mums!

Holy Moly I've never seen so many mums and pumpkins in my life! Everything has been a whorlwind for the past few weeks but the end is in sight! This saturday all the wedding stuff will be over and life can return to normal. For the time being there are mums and pumpkins all over the yard.
 
Boomer loves the mums but he keeps trying to eat the flowers!
 
Perhaps one of the greatest things about an October wedding is the abundance of natural decorations available. And you can't beat the prices! We were able to get a deal with a local pick-your-own pumpkin patch so that we paid one price to fill the trunk of a car with as many pumpkins as we could. Not too bad at all! There are so many colors, shapes, and sizes of pumpkins that just about anyone could find pumpkins to match their colors. As long as the deer leave these ones alone they should be just fine for the big day this weekend :)


I LOVE white pumpkins

We got all the mums for a great price by buying them form the local school soccer team's fundraiser. We've been trying to keep them alive for a few weeks but they seem like they will mostly all make it. We got 25 large plants and then another 30 of the smaller rusty-gold colored ones to use in the centerpieces.


These are only some of them! those yellow ones...they might not make it...

Things are certainly starting to get real as the days get closer! There's still so much to do! It's hard to fit in time for anything else by the time I get home from work and play with the dog and make supper for us! Hopefully life will calm back down to normal soon and we can get our new chicken coop/complex finished before the snaw starts to fall.


Cheers!

Tuesday, September 15, 2015

Creamy Chicken & Wild Rice Soup


One of my favorite things to cook (and eat!) are creamy, hearty soups. The weather is barely getting colder, but I'm already gearing up to make soups. My fiance Matt and I chose to have a soup bar at our wedding coming up in October and since I'm doing all the food for the event myself I've been busy making up big batches of soup and freezing them for the big day.

Today with the help of my mom I'm making up 6 batches of this creamy goodness so the amounts in the pictures might look a little big. Just follow the instructions below though and you will have your own pot of soup to warm your soul up with on a chilly day!

This soup has great flavor but it's sort of a cheater soup because the secret is a boxed rice mix. With all the rice pilaf and cheddar broccoli rice there is a Long Grain Wild Rice box that has a seasoning pack in it. That is what I use to make this soup, but I'm sure that same mix could be easily recreated. (Future blog post alert!)


The first step is to slice up all some carrots, celery, and onion. I use about 3 carrots, 2 sticks of celery and half to a whole sweet onion.

Pour around 2 tablespoons of olive oil in a large pot and then add the veggies you just sliced, about  teaspoon of dried marjoram, and the seasoning packet from the rice. Saute for five minutes then add the rice and 2 tablespoons or flour.


Mix that all up then pour in 7 cups of chicken broth. I use homemade stock or bone broth, but you can use canned broth or even 7 cups of water and 7 chicken bouillon cubes. Bring this mix to a boil and let er rip for a good 15 or 20 minutes.

While the rest of the soup is boiling heat up 1 full cup of heavy cream. Heating it up before adding it to the boiling soup helps the two combine better and also avoids causing the cream to get all weird. We don't like weird cream in our soups in these parts.


One heated/warmed, add said cream to the big pot and also add one cup of cut up cooked chicken (or more if your family is anything like mine and loves meat). Mix this all together and let the whole pot simmer for 30 minutes. Stir occasionally to prevent the soup from catching and to encourage the flavors to meld together. Add salt and pepper to your liking. YUM!

I recommend serving this soup with some fresh baked bread, but you can eat it however you like! It should be thick and creamy and herby-green in color thanks to the marjoram.


Creamy Chicken & Wild Rice Soup
  • 3 sliced carrots
  • 2 sliced celery sticks
  • 1 small sliced sweet onion
  • 2 tb olive oil
  • 1 box of Long grain wild rice (with seasoning)
  • 1 tsp dried marjoram
  • 2 tb flour
  • 7 cups chicken broth
  • 1 cup heavy cream
  • 1 cup cooked chicken meat
  • salt and pepper
  1.  Heat oil in large pot then add vegetables and spices, saute for 5 minutes
  2. Add rice and flour and stir, then add broth, boil 15 minutes
  3. Heat up cream then add to soup
  4. Add cooked chicken, stir, simmer for 30 minutes
  5. Add salt and pepper to taste

Fall might finally be getting here!

 
After spending a little time outside today I think fall may have finally arrived! While the sun is shining and everything is still bright and warm, there is that beautiful fall breeze rustling through the trees. The leaves around our home are just beginning to turn color and some have already begun to drop to the lawn. This is our pup, Boomer's, first fall and he is loving chasing the leaves around and pouncing on acorns!


The turning leaves and colder nights are a beautiful thing, but they are also a reminder that winter is coming and that we need to get more firewood rounded up, split and stacked. We also need to order some more heating oil as we cannot heat out home with the fireplace alone. :(

We're down to only 7 chickens at this point with the Cornish-rocks now in the freezer with the beef cow but maybe that's not such a bad thing as we head into winter. The Silver Laced Wyandotte pullets should be laying by the end of October and I can't wait to see their little brown eggs (hopefully in the nest boxes where they belong!) More updates to come on that later!

I recently ripped out some of my summer vegetables and re-tilled the soil before placing rows of carrot and beet seeds into the ground. The tender seedlings are poking up through the soil and ready to produce round two of our beets and carrots for this year's growing season. The green beans have slowed down dramatically and we've decided to try and save some seeds for next year so we will be letting the remaining pods grow and big and lumpy. We will then dry them and take out the seeds and cross our fingers that next spring we can buy at least one less seed pack!

First Blog Post - Welcome!

Hey There!

If you've landed here then wlecome to the blog! This is a place where I will talk about animals, cooking, farming, DIY, forestry, trying to buy a house/farm, and all sorts of things!

In the following posts you can expect to see recipies, diy projects, pictures and stories about animals, and lot's of things going on at our little homestead!

I'm so glad you're here!